Oversized or Cropped.

Before I even get started with today’s rant, I just have to take a minute to talk about our favorite gal Samantha and the fact that her and her hubby make the most adorable children like EVER. I mean, I know y’all have seen that precious Harper by now. I can’t get enough of those cheeks, not to mention the outfits. All this cuteness on my Instagram feed makes this perpetually single gal want babies. Lots o’ babies. Guess I kinda need a man first right?!

Enough of me living vicariously through this perfect little family, let’s get down to business.

blog (28 of 61)

blog (30 of 61)

blog (31 of 61)

blog (35 of 61)

blog (37 of 61)


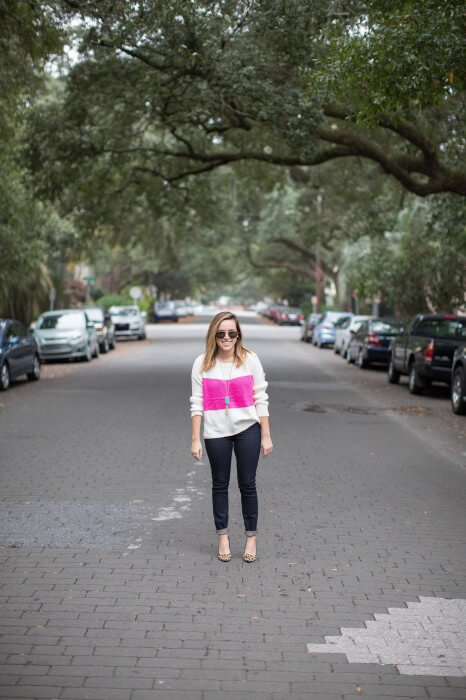
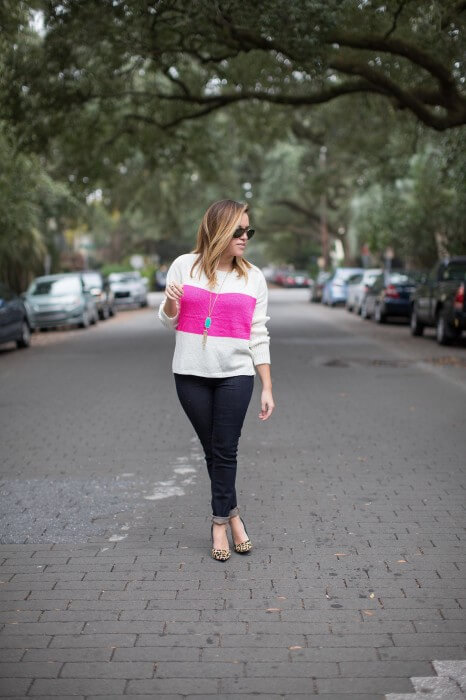
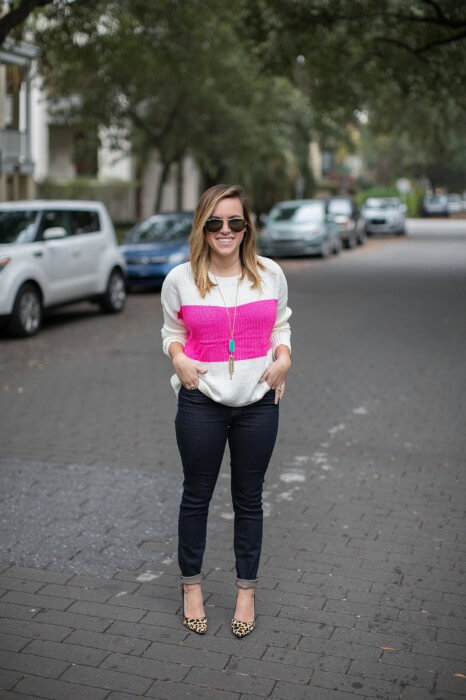
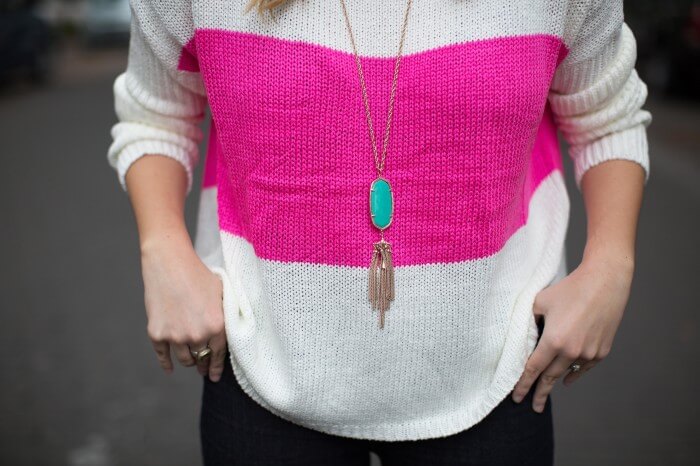
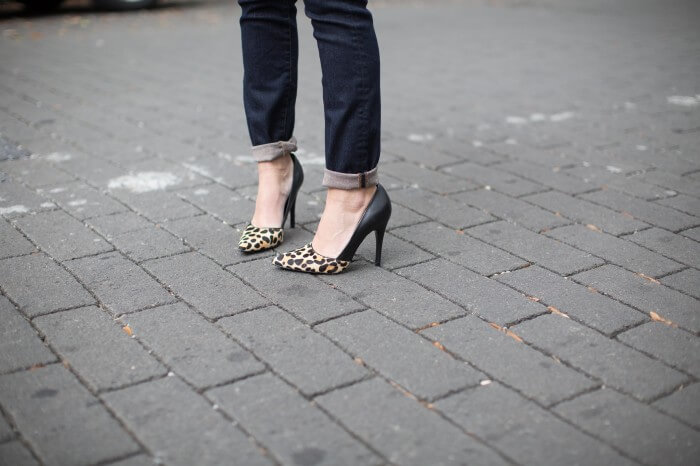
Top – Pink Blush // Jeans – J.Crew // Pumps – Marshall’s (they are Guess!) // Necklace – Kendra Scott // Sunnies – RayBans

This season it seems like everything is either oversized or slightly cropped. Sweaters, the infamous blanket scarves, t-shirts, even hats. You name it, it was cut three sizes bigger than normal or cut to show your belly button. Now, don’t get me wrong. The eternal “basic white girl” in me absolutely loves both trends. However, it is beyond easy to go from cute & trendy to Mary-Kate & Ashley bag lady style to you looking like you’ve tried on a 12-year-old girl’s clothes. Not to hate on the Olsen twins, they basically taught me everything in life growing up.

Fit and proportion are the key pieces in making these trendy shapes possible. The other items in your look have to be the right fit and give the opposite shape to make a look work.

For the cropped options (like the sweater in today’s pictures above):

1. High waisted denim (like the ones I got at J.Crew) to elongate and to not show too much skin.

2. Midi skirts. These are a god-send and probably my most favorite skirt EVER.

3. Large cardigans or the poncho to give texture.

For the oversized options:

1. Skin tight pants. Leather leggings are perfect. I also, spoiler alert, wear my yoga pants from Old Navy as pants.

2. The skinny, tailored sweatpants. Always with a heel.

3. Over-the-knee boots. Especially if the sweater is large enough to be a short dress. The one way pants aren’t always required.

**One thing I can’t stress enough is to find a tailor for your staple items. Someone to take the clothes from the rack you found them on, to one of a kind, only fit for you pieces. WORTH IT. **

Are y’all loving these oversized & cropped tops as much as I am?!

xo, Emily

My Favorite Gift Sets

BLovedBoston Collage

I have a confession to make!! I love gift sets, not only because there are so many goodies in one package, but because you get to test out so many products!! These are some of my favorite gift sets to give and to receive, perfect for the make-up lover or product hoarder in your life!!

Super Star Favorites

This little beauty has a large haul of Sephora’s best selling products in perfectly sized samples!! It’s a little bigger than a sample size and get’s you enough product to really test out if you like it!
Getting this set for Christmas and being to turn around and really get dolled up for New Years Eve would be perfect! It even has a metallic clutch that can double as your purse for your night out!! My favorite product is the fake lashes to really glam up your look!
If you’re anything like me then you love lipsticks and glosses – so this is the perfect gift set for the lip lover!!! I have the Bite Beauty Lip Crayon and the color is gorgeous!! My other favorite from this set is the Urban Decay lipstick – it’s my everyday lip color!
If you’re anything like me then your hands get super dry in the winter – these are some of the best hand creams out there!! They are full size so you’re basically getting one for free! Another option with this gift set is opening it up and gifting as a stocking stuffer for the ladies in your life!
One of my favorite things to have on hand in every purse, gym bag or make-up case is a travel size mascara. You can never have too mascaras right?! I really love all of these in the set, but They’re Real and Lancome’s Hypnose are my favorites. Another great piece in this set is the eye make-up remover that comes with it, it’s not oily and doesn’t leave a residue behind which I love!
I’m a huge fan of Josie Maran’s argan oils and this set is one I purchased for my mom last year and she’s already requested another one for this year!! It has her best selling products in here including the daily moisturizer which has an SPF of 47 and doesn’t leave your skin feeling greasy!!
So there you have it – a few of my favorite gift sets!! Are you a fan of gift sets? Which is your favorite?
-Biana

Winterize Your Makeup

Good Morning! I hope you’ve been loving my new contributors and their amazing posts so far because today I have Biana, from BLovedBoston, who is our newest Beauty Contributor! I honestly don’t remember how I met B (Ugh, damn you preggo brain!!) but I know it was shortly after I began blogging. She had just recently started blogging as well and would – without fail – read every one of my posts and leave me the sweetest and most supportive comments. She still does. Even when I get caught up with mom life and am lucky to leave her a single comment in a month, she is ALWAYS there, reading my posts, and being such an incredible friend and supporter of mine. I love her to pieces and I’m so happy that she’s agreed to donate her time to share some of her fab beauty tips, reviews, and tricks with all of you. You can also find her on Instagram, and if you’ve never checked out her blog, you definitely need to! Read more about her, and all the other contributors, here.
BLovedBoston Collage

While I realize that the harshness of winter weather is relative to where you live, I think we can all agree that there is a point in the season that our make-up routine just isn’t cutting it and doesn’t quite look as good as it did in the spring and summer. My skin starts to look a bit colorless and needs some life put back in, so I’m a firm believer in changing up the routine and adding in a few products that might be a bit too “heavy” for the summer but are perfect for Fall/Winter weather!

I prep my skin with Ponds Dry Skin Cream. It’s a little on the heavy side for the summer, but my skin gets dryer this time of year so the thicker formula is perfect! I don’t really like to wear foundation every day, but I feel like I need more coverage and Naked Skin is the perfect formula because as the name suggests it’s really light so I get the coverage without feeling like I’m wearing too much makeup!! Since my skin isn’t really tan to begin with, I need all the help I can get!! Enter in Benefit’s Hoolah bronzer!! It takes a really long time to get through one package and a little goes a long way. It’s perfect for that “just got back from St. Barth’s look” we all want to exude this time of year. Finally my favorite way to add a little life back into my face is with a really high watt lip color!! Bite Lip Crayons are so pigmented and don’t dry your lips out!! If you want the perfect red lip – try “Pomegranate!!”Do you alter anything about your makeup routine with the change of seasons?
XO,
Biana

Product Review: Younique 3D Fiber Lash Mascara

Lets talk about a product that I wanted so badly to hate…NOT because I hate beautiful, long thick lashes. NOT because I’m opposed to paying a for a higher-end product. NOT because it requires an extra 3 minutes of my time to apply. I assumed, and quite honestly wanted to hate this product because it always came across as “kitchy”, and only sold by pushy and slimy sales people, and because those creepy eye pictures that you see on Instagram of the spider lashes straight up freak me out. Well folks, I tried it out for myself, and even the skeptic in me was a little wow’d!

Ready for that creepy eye picture? I’ll do you one better and add in my absolute best serial killer stare. Be afraid.

creepy lash selfie EEK!!

There is absolutely NO WAY to make that not weird. Trust me, I tried. *Face turns 18 shades of red*

On my right eye I’m wearing 1 coat of my Lash Blast waterproof mascara, and on my left eye I’m wearing 1 coat of the Younique 3D Fiber Lash mascara. (For full disclosure, I did tightline my left eye with black eyeliner) The mascara was easier to apply than I had anticipated; First you apply a thin coat of the transplanting gel, then you immediately brush on the fibers while the transplant gel is still wet, and then you seal the fibers with another thin coat of transplanting gel.

PROS: I found the mascara to be extremely effective, easy to use, a rich black color, and removed similarly to my waterproof mascaras (using Clinique Take The Day Off Balm – my everyday makeup remover)

CONS: This is not the cheapest mascara (retailing at $29), it does take slightly more effort than a traditional mascara, and because it sets similarly to a waterproof mascara it might be harder to remove if you’re used to traditional mascaras. Also, I think for many people the carrying case is an added benefit, but because I travel frequently I prefer minimal packaging and found this to be a little large and clunky. I ditched the box and just threw both tubes into my makeup bag. Camryn is currently using my box as a purse. :-)

TIPS: Do one eye at a time. To avoid getting clumpy spider lashes only apply a THIN layer of transplanting gel. If you find that you’re having fall-down of the fibers then you need to seal them better. Try applying two coats of the gel after applying your fibers. I also used a clean spooly brush to comb through my lashes at the end. If you curl your lashes, like me, you might find that as you build them up they touch your lid and transfer product. To solve this problem I busted out the good ol’ spoon and held it against my lid while applying the transplant gel (only if I was wearing eyeshadow, otherwise I just went to town applying the gel and used a makeup-remover-soaked q-tip to clean my lids after).

Here’s how the product arrives:

3D fiber lash 4 3D fiber lash3 3D fiber lash2

Transplanting Gel

3D fiber lash

Fibers (yes, it’s weird putting fiber-glass-looking fibers so close to your eye the first time…you get over it!)

Ready for the best part about trying this mascara? If you hate it, you can send it back. Yes, seriously. They want you to love it or get your money back. You can also receive free shipping with all orders over $100. Oh, and did I mention the mascara is meant to last 3-4 months? MONTHS!! I loved hearing that because I’m a stay-at-home-mom, and I don’t exactly need pow-pow lashes on a daily basis, so knowing it will still be in good condition 2 weeks (or months) from now when I need it is a huge bonus!

If you’re interested in trying out this mascara, you can order here. I received mine from the absolute sweetest (and not at all pushy) younique rep, Kayla. She answered tons of my questions (like, “are you sure this shit is safe? It looks like fiberglass.” And “What am I doing wrong, I got the fiberglass stuff in my eye!” Hahaha Sorry Kayla, I was a newbie!) I am not receiving any compensation for telling you about her, nor will I receive any free merchandise or compensation from your purchases through her – I just genuinely like her and have had a good experience working with her. Kayla and I actually met initially on Instagram, so you can go stalk her there if you want too. She has a super cute little boy!! ;-)

If you’re interested in becoming a Younique consultant like Kayla be sure to contact her for additional information. The setup fee is $99, and there’s no monthly fee’s.

If you try this, it’s only fair that I get to see your serial killer eye selfies, so make sure you tag me!!

XO – Samantha

{Product Review} Tarte Amazonian Clay Foundations

tarte foundation

I mentioned a few weeks ago that I had purchased the Tarte Amazonian Clay Full Coverage Foundation, and Airbrush Foundation (aka powder foundation) after hearing a few of my favorite beauty YouTube’ers rave about them. I love Tarte as a brand, and have really enjoyed many of their products over the years, so I had really high hopes for both of these products. I have been using both for awhile now, and feel confident that I can give a pretty honest and full review of each.

Before jumping into either product, let me (for the millionth time if you’ve been following my blog for the last year) tell you a little about my skin type. I have dry/combination skin, leaning more heavily towards dry. I have very thin skin which shows veins, freckles, and scarring very easily. I exfoliate my skin 3-5 times weekly using either a mask or bead/scrub exfoliant to remove dry skin, which prevents me from having too many dry patches. I use heavy moisturizers, particularly around my eye area.

With that said, lets jump into the cream foundation review first!

tarte foundation coverage

tarte6

Closer look at the photo 4/4 from above (same photo, just rotated). Creamy foundation finish.

As you can see, the cream foundation is very thick and (no surprise) creamy. I would say this is a medium-full coverage foundation, very buildable, and creates a very airbrushed effect like it claims. The foundation dries very soft, and almost powdery to the touch, and leaves a natural-matte finish. I haven’t had issues with breakouts while using this foundation, but I did use the Hourglass primer as a base before every application. I only noticed patchiness after 8+ hours of wear, if ever. The cream foundation offers SPF 15, and is oil-free. I wear color light-medium sand.

So…I like this foundation…but I don’t love it. For someone with combination/oily skin I would definitely recommend this, but for anyone with much drier skin I would stick to a more radiant foundation like the Nars Sheer Glow, or even a more natural setting foundation like MUFE HD foundation. I found that the Tarte cream foundation settled into fine lines, and emphasized blonde baby hairs on my face around my hairline. It aged my skin because of how matte it looked on my already dry skin, and I found myself adding Becca Shimmering Skin Perfector to it (before applying) to create a slight glow. There is absolutely nothing wrong with this foundation, and I think it’s a great product for some people, it’s just not for my skin type.

Let’s talk about the airbrush powder foundation…

I have used Bare Minerals powder foundations in the past and had really great results, but always felt like the powders were sitting on top of my skin, so I wanted to try the Tarte powder in comparison. In a nutshell, they are two very different products. Where they Bare Minerals provides a medium coverage, the Tarte provides a light-medium (buildable) coverage. Where B.M. has a matte finish, Tarte has a more glowing, slightly shimmery finish – not everyone’s cup of tea. Both products sit on top of my skin to a degree, but less so with the Tarte powder. I appreciate the range of colors available in the Tarte line (I wear light-medium neutral).

tarte powder finish

Here’s the finish of the powder foundation. As you can see, there is some settling into fine lines, and it emphasizes my dry skin.

Tarte Shimmer This is the best photo I could capture of the “shimmer”/glow the powder foundation has. Because I have drier skin I actually enjoy the slight glow to my foundations, but someone with oily skin or acne may not want attention drawn to those areas (which shimmer does – hence why we use matte concealer on blemishes).

Similar to the creamy foundation, the powder formula lasts all day. These two foundations are really incredible paired together when you’re looking for a full coverage, flawless, airbrushed face. I wore them together to a wedding, in 75-80 degree heat, for hours and had great results. You can see what it looked like here. I also sprayed my face with the Urban Decay Chill setting spray, as well as my husbands face because he sweats like a whore in church even when it’s only 65 out. ;-)

I hope that helped to answer some of your questions about these products. If any of you use either of these, please leave a comment below letting everyone know what YOU think of them, because they will work differently on everyones skin. Also note your skin type if you leave a review.

Happy Hump Day!

XO – Samantha

Beach Babe Essentials

Remember a few weeks ago when I said I would share my beauty essentials for your pool/beach bag? Oh, you do? I didn’t…and only remembered after going through pictures on my camera. OOPS! This baby brain is for realz y’all.

beachbagbeauty.jpg

1.|| Victoria Secret Bronze Glow Body Tint – Repackaged & renamed, but still the same awesome bronzing lotion. This creamy lotion will provide all-over color and shine and instantly give you that VS model glow. It’s not a self-tanner, so you never have to worry about looking streaky or having orange hands the next day. I love applying this to my legs when I’m wearing a short dress, or my collar bone for strappy tanks.

2.|| Wet Wipes – Never leave the beach with sweaty, smelly armpits. Pack some scented wipes, and get yourself smelling beachy, not stinky. Any brand will work, but I’m a big fan of these You Smell lemon scented wipes. They’re alcohol free and won’t dry out your skin.

3.|| Body Spray – I really love that beachy, coconut, sunscreen smell, and St. Tropez’s Smell Bent spray is exactly that. I like to spritz a very small amount on after trips to the pool or beach and enjoy the sweet smell of summer.

4.|| BB Cream or concealer – If I’m planning on going from the beach to lunch or dinner with friends, I like having a BB cream that’s hydrating, or a concealer and rich face cream to conceal those little imperfections and hydrate my skin. I keep my Dr. Jart+ Premium BB cream in my bag because it’s a moisturizer, sunscreen, and treatment serum all-in-one.

DSC_2066 5.|| Chapstick & Lip Stains are a must for beach days, and my favorites are the Blistex Deep Renewal and the Loreal stains (photo shows Coral Tattoo).

6.|| A nail polish isn’t a beach bag necessity, but if you get bored sitting poolside like I do it’s a great time to polish those fingers. My current favorite polish is “Fearless” by Revlon. (I’m wearing it in this instagram pic)

7.|| My everyday mascara is also my must-have beach mascara…because it’s amazing!! It holds a curl, never smudges, makes my lashes look long a fluffy, and is the best black. If you’ve never tried Maybelline’s The Falsies, you need to. Tip: Stick to the original formula in Black Drama, and get waterproof if you live in hot, humid climates like I do. If your lashes never hold a curl, you should also look into waterproof.

What do you pack in your beach bag to transform into a bronzed babe after hanging poolside?

XO – Samantha

Let’s go to the beach…

pool bag.jpg …and by beach, I really mean the pool!

Anytime I leave the house, especially with Camryn in tow, I have to make sure I have all the essentials. The pool is no exception. With that said, I also don’t want to be hauling around a million products that I don’t need, because a wet toddler is already a handful enough! Here are my must-have pool/beach bag items. Lets start with the most obvious – a good pool bag. I got mine last year from Barnes & Nobles for $10 with the purchase of a book. It’s large, easy to clean, and came with a palm tree keychain that was Camryn’s jam for weeks. *Winning* I always pack a sun hat, water (add cucumbers to stay hydrated and reduce swelling), and a good book or trashy magazine. My mom and I have both been wanting to read The Fault In Our Stars, so I bought it yesterday for her to read while she’s visiting, and then I’ll read it after she finishes.

poolbag3.jpg

1. Camryn has fair skin, and I’m trying to not look old yet, so a good sunscreen is a must. I bought the La Roche-Posay Anthelios XL 50+ spf UVA/UVB oil in Paris last fall, and instantly fell in love with it. It’s geared towards sensitive skin, or people with a sun allergy. It claims to prevent sun spots, especially in pregnancy, and is water-resistant and hypoallergenic. I feel extremely safe putting this on Camryn’s skin, as well as my own pregnant belly. It feels incredibly hydrating, and has prevented sunburn even in the 100 degree texas weather. It’s unfortunately not sold in the U.S. but can be bought through Boots and shipped internationally.

2. Supergoop facial serum is one of the only daily sunscreens that I can use without noticing a build-up of oil and acne. It’s lightweight, less fragrant than other facial SPF’s, and hydrates my skin while fighting discoloration in my skin. I use this everyday before applying my makeup, and apply it multiple times while hanging out at the pool.

poolbag1.jpg

3. My beloved wet brush. I couldn’t live without this brush. I have extremely thick, long, and curly hair that tangles if you look at it the wrong way. A day in the pool or at the beach does serious damage to my hair, and I’d be helpless without my wet brush. It’s less than $10, and it does the job of an army on my tangled tresses. Every lady should own one. Enough said.

4. A hair mask – really any good hair mask will work, this is just what I’m trying to use up. It’s a great product, and I especially like the DermOrganics argan oil, but it’s not one that I’m saying will change your life. If you have long hair, or color treated hair, do yourself a favor and pack a deep conditioner. Your hair will thank you.poolbag2.jpg

Last but not least, a cute headband and hair tie to keep your moisturized hair off your face, and a pair of sunnies. My black & white striped headband is from Little Big Dreamers (and is actually Camryn’s, but dangit it looks cute on me!), and my sunglasses are from House of Harlow (no longer available). I love taking these in my beach bag because they don’t press down on my cheeks like some sunnies do. I hate when sunglasses touch my cheeks and get makeup or sunscreen all over them, and leave red lines on my cheeks. Camryn loves these glasses too, and has been seen sporting them here, and here. :-)

What do you keep in your beach bag? Tomorrow I’ll share my beach bag “beauty essentials” that take me from sweaty beach bum to bronzed babe in minutes.

My mom is flying in today, and will be staying with me for 10 days, so I won’t be posting on Thursday, but you can catch me back on Friday. Side note: Moms are the best, aren’t they? I called her a few months ago, right after getting pregnant, in full-blown panic mode stressing over my house being cluttered, and needing to purge before baby #2 arrives…she booked a flight that week and is coming to be super-mom and help me organize and have a garage sale to get rid of things we don’t need before bringing in new furniture and baby stuff. Best. Mom. Ever. She is also the queen of laundry, so I may have stopped washing all my clothes last week in anticipation of her arrival. ;-) Outside of making her do days and days of hard labor (like painting Camryn’s room, and the nursery) we’ll also be enjoying a few pool days, ballet classes, pedicures, and movie dates.

XO – Samantha

Kiehls Haul

DSC_1652

kiehls

I have had my eyes on a the Midnight Recovery line by Kiehl’s for months, and was lucky enough to come across a Kiehl’s store in the Boston airport over Mothers Day weekend and snagged both the eye “serum” (which is the consistency of a cream) as well as the face serum. I was in need of a new overnight eye cream that packed a moisture-punch, and had heard nothing but rave reviews about the creamy eye treatment with avocado, so of course I picked one of those up too. When in rome, am I right ladies? Plus, it was Mothers Day weekend, so it’s not like my husband was saying no. ;-)

I’ve talked about my skin a few times in the past, but let me tell you a bit more about my pregnancy skin…it’s hell, in a nutshell. My skin becomes even more dehydrated than usual, and I get acne like a pizza eating 14 year old boy going through puberty. I get, what is so fondly called, the pregnancy mask. Basically that means I get dark, and often red, discoloration/patches all over my skin. It’s kind of like when you go on a long flight and find that for about a week afterwards your skin is super dry from the recycled airplane air, but then it also breaks out…win-win! Oh, and BONUS, I can’t use topical acne treatments or washes. My best friend these days is my clarisonic, and a few masks and products that I’ll go into more detail about another time.

In the last few years (pretty much when I had my daughter) I started noticing fine lines and dark circles around my under eye area, specifically near my tear duct, causing my concealer to crease. I had been testing a million and one products that claim to reduce fine lines, and prevent further aging, but few have been worth repurchasing. Then my sweet friend Bethann (who is such a babe, so I’d use anything she does) told me she used the Midnight Recovery Eye Cream and was seeing results, and I was onboard immediately. Both the midnight recovery products have been amazing, and definitely worth repurchasing in the future. The combination of the M.R. eye cream + the creamy avocado eye cream have completely rehydrated my under eye area and plumped the skin, reducing the visible signs of aging. I noticed a change in the texture of my under eye area after just a few days, and really saw a decrease in my concealer creasing, and dark circles after a few weeks. I use the avocado eye cream day and night, but I wouldn’t recommend that for everyone, especially if you have oily skin as it is very rich and creamy.

The M.R. facial serum has the best spa-like smell, and the oil absorbs into my skin almost instantly without leaving an oily residue. What I love most about this serum is that it has dramatically reduces the time that acne and post-acne blemishes/scars linger. It’s also helping to even out the red and dark patchy areas on my face from my crazy raging hormones. I use this immediately after cleansing my face in the evening using my clarisonic, and if my skin feels like it could use even more moisture I’ll apply a night cream over the top after the serum soaks in.

Quality skincare is always an investment, but I feel like all 3 products have lived up to what they claim to do, and will last me quite a long time.

Have any of you tried these products? Are there other Kiehl’s products that you recommend?

XO – Samantha

Crest 3D Whitestrips

My sweet friends over at Crest sent me some happy mail a few weeks ago, and asked me to give my honest feedback on their new 3D White Luxe Professional Effects Whitestrips. I’ve used similar products in the past, as well as professional whitening trays from my dentist, the Glo whitening kit, and in-office Zoom. I was eager to compare the results, especially against the higher priced brands.

The box contains 40 strips; 20 treatments (top & bottom). Directions recommend wearing the strips for 30 minutes a day until you reach your desired whiteness. I have very sensitive teeth, so I chose to whiten every other day instead.

I started by flossing and then brushing my teeth using the 3D white toothpaste & accelerator, which I already owned. I dried my teeth with a paper towel, and applied the lower strip first. I suggest using a toothpick or your nails to press the whitestrip in between the crevices of your teeth so you don’t have white surfaces but yellow gaps in between. Apply the top strip the same way, and be sure to fold the remaining strip over the backs of your teeth. If you have sensitive teeth like me, avoid getting any of the whitestrip or gel on your gums because it’s typically the nerves in your gums that get irritated and cause that piercing feeling in your teeth.

My husband and I split the box and did 10 treatments each. I wanted a second opinion because I do have sensitive teeth and he doesn’t at all.

After about two weeks my teeth were practically glowing.

crest.jpg

Sorry for the crappy iphone pic, and cheeseball smile. I was wearing Lady Danger by MAC, with a Rimmel Stay Glossy over the top, which did make my teeth look even whiter. I was extremely impressed by these strips, to say the least.

My final thoughts…

  • Affordable (roughly $39.99 per box)
  • Effective – Half a box whitened my teeth to my desired color.
  • Ease of Use – VERY easy to use. You only wear them for 30 min and they do not budge. I was actually worried the first time I tried taking them off because they literally stick like glue. I could have a full convo with my husband while wearing them, no problem.
  • Little sensitivity for me, none for my husband.

In comparison to the other whitening treatments I’ve had/used, I would go back to these above all the rest. Zoom is very expensive, and requires a significant amount of time at the dental office, in addition to wearing take home trays for weeks after. Zoom also caused a horrifying pain in my teeth; I would avoid Zoom for that reason alone. Glo is as effective (or more effective), but inconvenient. The tray has to be taken out every 8 minutes, rinse your teeth and re-apply new whitening gel (repeat 4 times…yes, FOUR!) The mouthpiece also hurts my jaw, and it’s significantly more expensive. Similar whitestrips lack in sticking power, and end up sliding around my mouth, and foaming…which is gross, and makes me dread wearing them.

So there you have it. I’m a Crest 3D whitestrips kinda gal…except right now…Doc says no whitening because baby doesn’t like to eat bleach for breakfast. ;-)

What whitening products do you use? Have you tried the new Crest strips?

Hope you all have a great hump day!

XO – Samantha

*This product was gifted to me to review. My opinions, as always, are my own. If the product was crap, I’d tell you.*

Goodbye Winter Feet…

Hello Lovelies!

This might be a little awkward. I don’t usually talk about my feet with my friends, and frankly, they’d probably stop being my friends if I did…But, spring and summer are upon us, and I know I’m not the only one who needs a little tootsie TLC. I live in my sandals, almost year round, and i’ve discovered a few tricks that really help keep my feet looking their best.

Here are a few of the things my feet can’t live without during flip-flop season:

flexitol Flexitol Foot Balm

This foot cream doesn’t smell like perfume and doesn’t come in a fancy bottle that you’ll want to display on your vanity, but this stuff works! I’ve tried more expensive foot creams than I care to admit, and this is my hands down favorite. (I also love using aquaphor.) I slather this on my feet every night before bed and it keeps my feet soft and callus free.

leopard socks

I’m also obsessed with wearing gel heel socks overnight (I apply moisturizer first, then heel socks). Any brand will do, I’m sure, but this leopard pair is obviously sexier…or not?!

I keep a foot rasp in the shower and exfoliate any dead skin away once a week. I like to slather my feet in soap first, and then use the rasp, versus using it on wet (non-soapy) feet.

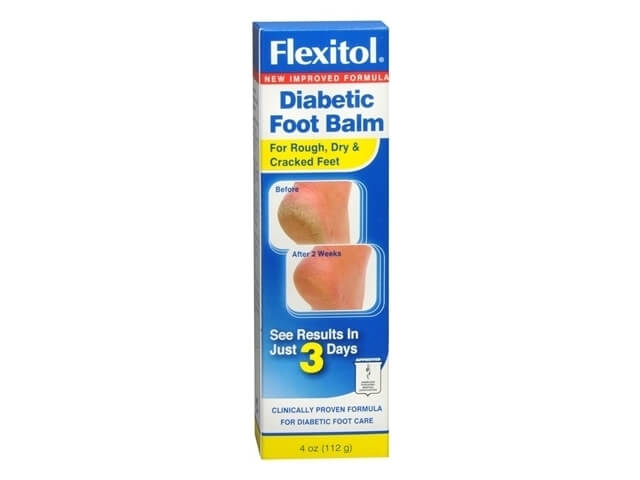
Speaking of flip-flop season, I bought these gladiator sandals on sale at Target a few weeks ago and I’m in love with them!

I’m also stalking these, and praying they go on a 90% off clearance sale. A girl can dream. ;-) I might snag these instead.

Oh, and currently on my toes – Essie’s Style Hunter. I just picked up Spin the Bottle and can’t wait to try it. I’ll Instagram a pic sometime this week.

Hope you’re all having a great week.

XO – Samantha

Follow

Get every new post delivered to your Inbox

Join other followers: